Quantcast
Channel: ODTUG Aggregator
Viewing all 2258 articles
Browse latest View live

Required Asterisk Left of Item Label

$
0
0
If you ever had a customer asked you to move the required asterisk of the item's label before the item itself, you probably had to copy the existing template and move the span that holds the asterisk before the item itself then you had to go through all you labels to change the template.

Lately, I've been testing my demo application in the EA of Apex 5.1 and looking at the code and how things changed from 5.0 to 5.1.

Among all the changes, I noticed that the Apex team started to use the CSS3 order property.
Definition
The order property specifies the order of a flexible item relative to the rest of the flexible items inside the same container.
Note: If the element is not a flexible item, the order property has no effect.

Basically, this property can reorder items within the same container granted that the container is using the flex property.

To move the asterisk span using only CSS, we can use the following code:
.t-Form-fieldContainer .t-Form-labelContainer {
display: flex; /* Make sure the container is using flex */
justify-content: flex-end; /* Keep items right aligned */
}

.t-Form--labelsAbove .t-Form-fieldContainer .t-Form-labelContainer,
.t-Form--leftLabels .t-Form-fieldContainer .t-Form-labelContainer,
.t-Form-fieldContainer.t-Form-fieldContainer--stacked .t-Form-labelContainer {
justify-content: flex-start; /* Keep items left aligned */
}

.t-Form-fieldContainer .t-Form-labelContainer .t-Form-required{
order: 1; /* Asterisk as first element */
}

.t-Form-fieldContainer .t-Form-labelContainer .t-Form-label{
order: 2; /* Label as second element */
}

You can have a look at my Demo Application

EDIT1: Fix an issue with above labels.
EDIT2: Fix an issue with "Blank with Attributes" region template.

Migrating to Oracle APEX 5.0 is PIVOT-AL

$
0
0

Migrating to Oracle APEX 5.0 is PIVOTAL

From time to time we need to pivot data for presentation purposes. It’s not something I do everyday, so the syntax is usually something I have to pull from the old toolbox as needed. With Oracle APEX 5.0, you can now pivot data within an interactive report and it’s quite easy.

Let’s say we’ve got a table of Super Bowl quarterbacks and their pass attempts per quarter.

oracle apex pivot data

…but we really would like the data displayed where we can compare the quarterbacks side by side…a textbook pivot. To accomplish this, go to Actions / Format / Pivot. There you see a dialog box that requests the pivot column, the row columns and the data to be included in the grid. The “Sum” checkbox does exactly that…totals the columns.

oracle apex pivot data columns

…resulting in the following output.

Obviously you should season to taste, but there you have it! Your data instantly pivoted courtesy of APEX 5.0
If you have data presentation requirements you just can’t crack, please contact me for a free consultation. Making the call could be, well…PIVOTAL.

Contact Us

The post Migrating to Oracle APEX 5.0 is PIVOT-AL appeared first on Insum.

ITTage 2016 - Tag 1 - 13.12.2016

$
0
0
Der erste Tag starte bei mir mit InMemory Technologien bei Oracle Datenbanken von Ulrike Schwinn. Hier gings vor allem darum verschiedene Techniken vorzustellen die es nicht nur seit der neuesten Version 12c gibt. Anfangen sollte man immer auf dem Hostsystem bzw. der virtuellen Umgebung und sich ein Bild davon machen wie viel Ram und Plattenplatz die Maschine hat und wie viel bisher für die Umgebung vorgesehen ist. Weiter wurden dann Themen wie AWR Reports, Statspack und der Memory Advisor erwähnt. Auch Parameter wie SGA_TARGET und DB_CACHE_SIZE_MIN sollten geprüft werden damit auch hier keine Engpässe in der DB entstehen. Um einen Überblick zu bekommen wie es mit dem Cache und konkreten Objekten aussieht bietet sich die View v$BH an. Anschließend gings dann noch um das Thema Caching, in wie weit Tabellen im Cache oder per IO nachgeladen werden (SMALL_TABLE_THRESHHOLD) oder das man im Ausführungsplan sehen kann wo der result_cache greift.
Auch wenn ein großer Teil der Themen bekannt ist war es eine gute Übersicht und ein super Einstieg.

Wie von anderen Konferenzen bekannt gibt‘s auch auf der ITTage Konferenz Keynotes und die erste war von einem der MariaDB Gründer Kaj Arnö. Auch wenn man als Oracle Spezialist wohl kein MariaDB einsetzt, war es doch interessant zu wissen wie MariaDB so entstanden ist. Als Abspaltung von MySQL und vom Namen der Tochter „Maria“ des anderen Gründers weiß man nun woher die Datenbank kommt. Richtig interessant ist natürlich, wie schnell sich MariaDB im Vergleich zu MySQL weiterentwickelt hat und wie verbreitet die Datenbank auch in den ganzen Linuxdistributionen ist. Bisher war auch ein Wechsel zwischen MariaDB und MySQL recht schnell möglich, aber ab der kommenden Version geht Oracle mit MySQL explizit von MariaDB weg. Auch bekommt MariaDB in Zukunft mit der BSL eine interessante Lizenzstruktur, welche im Prinzip nur bei sehr großen Umgebungen oder Kunden mit sehr großem Umsatz als Lizenzkosten zum Tragen kommt.

Im nächsten Vortrag gings dann um das Thema Multi Cloud Sourcing. Dies war dein leider ein Herrstellervortrag, der im Gegensatz zu den meisten anderen Vorträgen eher eine Pleite war. Klar ist ein Ansatz eines lokalen Cloudanbieters, der die Daten in Deutschland vorhält und gute Schnittstellen zu den großen Cloudanbietern vorhält auch gut, aber es war dann doch zu sehr eine Werbeveranstaltung.

Im nächsten Slot hab ich dann mal nen Open Source im Industrie 4.0 Bereich besucht der von Heinz Wilming gehalten wurde. Im Gegensatz zu vielen Individuallösungen mit einem möglichst geringen Set an unterschiedlichen Tools, wurde hier ein genau umgekehrter Ansatz vorgestellt. Es wurden recht viele verschiedene Technologien gewählt, welche auch für die Industrie zertifiziert sind, zusätzlich wurde eine „Mica Box“ (sowas wie ein Industrie Rasperry Pie) eingesetzt um eine Flotte von Fahrzeugen zu managen. Ich persönlich kann mir sowas eher nicht vorstellen mit den ganzen Schnittstellen und verschiedenen Tools, aber durch die Standards und ohne Individualentwicklung scheint es dennoch möglich zu sein, sowas im großen Stil zu nutzen.

Nach den doch teils weit von Oracle entfernten Technologien gings dann in einen Multitenant Vortrag von Johannes Ahrends. Hier gab’s dann ein paar interessante Punkte die eine PDB nicht nur als getrennte Datenbanken ansehen lässt sondern noch aufzeigt wie abhängig diese von der einen Instanz sind. So ist in 12.1 kein Flashback nur in einer PDB möglich und man sollte nicht vergessen, dass das ganze Thema auch Lizenzkosten extra kostet und die PDB’s einzeln gepatched werden müssen. Aber in 12.2 ist es zumindest möglich PDB’s mit verschiedenen Charsets in einer CDB laufen zu lassen, wobei man natürlich beachten muss, dass die CDB als AL32UTF8 läuft und die PDB’s mit anderem Charset vorher in einer anderen DB erstellt werden müssen.

Das nächste Thema wurde von Christian Grave vorgestellt und es war „Lizenzverhandlung“. Im ersten Moment hatte ich noch vor dem trockenen Thema zurückgeschreckt, aber von einer Person außerhalb von Oracle selber wollte ichs dann doch mal hören. Der Vortrag war dann doch eine positive Überraschung da die Folien nicht als dröge Textpräsentation aufgemacht war, sondern als nette Geschichte und auf einem echten Fallbeispiel basierte. Interessant wie man mit Verhandlungsgeschick auch eine Lizenzierung auf VMWare hinbekommen kann, ohne jeden Kern zu bezahlen oder was man beachten sollte wenn man externe Hoster einsetzt und diese auf einem die Infrastruktur so ändern, dass die Lizenz überhaupt nicht dazu passt. Zuletzt noch die Einbindung des Oracle Advisory Service als kostenlose Qualitätsüberprüfung zu nutzen hörte sich echt gut an.

Weiter gings mit Randolf Geist und dem Cost Based Optimizer. Auch wenn ich das Gefühl hatte einen Teil des Vortrags schon zu kennen gabs auch hier ein paar interessante Punkte. Wer zum Beispiel den Optimizer komplett alleine arbeiten lässt und einige Caching Mechaniken in seinen Querries nutzt, sollte beachten, dass diese jede Operation so rechnet, als würde sie wirklich ausgeführt werden und eben nicht gecached wird. Auch wenn es mit 12c einige neue coole Features gegeben hat waren doch in 12.1 eine Menge von Features aktiviert, die mit 12.2 wohl wieder per default deaktiviert sind, weil nicht alle so vorteilhaft sind.

Im nächsten Vortrag gings dann zwar um SQL aber nicht nur um Oracle. Markus Winand als Person hinter „use-the-index-luke“ und „modern SQL“ stellte die verschiedenen SQL standards vor und stellte gleich am anfang den Vergleich von WIN 3.1 und SQL92 dar mit der Frage warum manche Abfragen erstellen die aus den 90er stammenJ. Insgesamt bekam man einen guten Überblick welche SQL Server, welche Standards benutzen und dass man mit Oracle ganz gut fährt. Aber auch wenn ich den großteil kannte, war es gut zu wissen, welche SQL Standards genau hinter welchen Features stecken und dass die OFFSET Funktion in SQL eher nicht so clever ist.


Beim letzten Vortrag von Urs Enzler über agile Strukturen gabs dann nochmal nicht Oracle Kost. Aber ein paar interessante Punkte, sind durchaus von agilen Projekten auch in APEX/Oracle gut zu nutzen. Vor allem das Probleme oft von nicht funktionalen Fragen wesentlich mehr getrieben werden als von funktionalen. Sprich die Anwendung muss an sich performant laufen und die Anzahl User müssen gut mit der Anwendung arbeiten können, bevor man klärt was die Anwendung selber machen soll.

Oracle Cloud Experience at Georgia Oracle User Group Tech Days 2017

$
0
0

The Oracle Cloud Experience Technology Hands-on-lab Workshop is sponsored by the Cloud Computing SIG of IOUG. We are proud to announce our participation at the Georgia Oracle User Group Tech Days on March 15-16, Atlanta, Georgia. Every attendee will be given a Kindle version of the Oracle Cloud Pocket Solutions Guide:

NewImage

The Cloud Experience Technology Hands-on-lab Workshop will start with creating a database in Oracle Cloud. We will also focus on backing up an on-premise database to the cloud and various solutions that’s available from Oracle to backup both Oracle databases and non-Oracle databases. We will discuss complete solution options that you can implement as you make your journey to Oracle Cloud.

Attendees will :
• Learn how to set up OS secure authentication, generating private and public keys
• Learn about various kinds of containers in Oracle Cloud and create a storage container to leverage for the hands-on lab
• Learn when and how to use the cloud for business projects
• Learn methods to backup databases to the cloud, configure Oracle Recovery Manager to backup to and restore from the Oracle Cloud.
• Learn methods to migrate databases to the cloud.
• Create a database in Oracle Cloud
• Communicate from on-premise to the database that resides in Oracle Cloud
• General Q & A with community experts

We will also discuss real-life solutions addressing security concerns, opening ports, creating database links/communicating with databases in Oracle Cloud, and innovations that Oracle has made to Oracle Cloud in the past 2 years.

about JET Diagrams (JET v2.2.0) in Apex 5

$
0
0

This is a followup from my older blog post “Integrate Oracle JET into Apex 5“.

Oracle JET Diagrams are a new data visualization type in Oracle JET 2.1.0.

This post is organized into three mostly independent parts

  1. How to setup Oracle JET v2.2.0 for usage in Apex
  2. How to copy Oracle JET Container Diagrams from the cookbook into Apex
  3. Using Oracle JET Diagrams with container layout


How to setup Oracle JET v2.2.0 for usage in Apex

Step 1) Download the base distribution

From the download page (http://www.oracle.com/technetwork/developer-tools/jet/downloads/index.html) choose the base distribution and download this zip file.

Step 2) Unzip JET into the APEX image folder

Copy and unzip the file into a folder insider your image path from apex.Where you put it is your own choice. I prefere to add it to the library path where oracle jet will also be in Apex 5.1 distribution (/libraries/oraclejet/2.0.2)

You can choose a very similar path “/libraries/oraclejet/2.2.0”. Create this path and unzip the file there.

The next time apex is upgraded remember not to move the image folder but simply to overwrite it (make a copy of the original before that).

Step 3) Create, manipulate and deploy the main.js file

Basis for this should always be the main-template.js file from the subfolder \js\libs\oj\v2.2.0. This template has all the correct paths and versions for all sub modules that are included in the main.js.

Additionally we can add a base-url that points to the folder where we unziped JET. If we add the main.js file in the js folder, then this is not needed. But we come back to that base-url later. So for JET version 2.2.0 the complete main.js file will look like this.


/**
* Example of Require.js boostrap javascript
*/

requirejs.config({
// Path mappings for the logical module names
paths: {
'knockout': 'libs/knockout/knockout-3.4.0',
'jquery': 'libs/jquery/jquery-3.1.0.min',
'jqueryui-amd': 'libs/jquery/jqueryui-amd-1.12.0.min',
'ojs': 'libs/oj/v2.2.0/min',
'ojL10n': 'libs/oj/v2.2.0/ojL10n',
'ojtranslations': 'libs/oj/v2.2.0/resources',
'text': 'libs/require/text',
'promise': 'libs/es6-promise/es6-promise.min',
'hammerjs': 'libs/hammer/hammer-2.0.8.min',
'signals': 'libs/js-signals/signals.min',
'ojdnd': 'libs/dnd-polyfill/dnd-polyfill-1.0.0.min',
'css': 'libs/require-css/css.min',
'customElements': 'libs/webcomponents/CustomElements.min',
'proj4': 'libs/proj4js/dist/proj4'
},
// Shim configurations for modules that do not expose AMD
shim: {
'jquery': {
exports: ['jQuery', '$']
}
},

// This section configures the i18n plugin. It is merging the Oracle JET built-in translation
// resources with a custom translation file.
// Any resource file added, must be placed under a directory named "nls". You can use a path mapping or you can define
// a path that is relative to the location of this main.js file.
config: {
ojL10n: {
merge: {
//'ojtranslations/nls/ojtranslations': 'resources/nls/myTranslations'
}
},
text: {
// Override for the requirejs text plugin XHR call for loading text resources on CORS configured servers
useXhr: function (url, protocol, hostname, port) {
// Override function for determining if XHR should be used.
// url: the URL being requested
// protocol: protocol of page text.js is running on
// hostname: hostname of page text.js is running on
// port: port of page text.js is running on
// Use protocol, hostname, and port to compare against the url being requested.
// Return true or false. true means "use xhr", false means "fetch the .js version of this resource".
return true;
}
}
}
});

/**
* A top-level require call executed by the Application.
* Although 'ojcore' and 'knockout' would be loaded in any case (they are specified as dependencies
* by the modules themselves), we are listing them explicitly to get the references to the 'oj' and 'ko'
* objects in the callback.
*
* For a listing of which JET component modules are required for each component, see the specific component
* demo pages in the JET cookbook.
*/
require(['ojs/ojcore', 'knockout', 'jquery', 'ojs/ojknockout', 'ojs/ojbutton', 'ojs/ojtoolbar','ojs/ojmenu'], // add additional JET component modules as needed
function(oj, ko, $) // this callback gets executed when all required modules are loaded
{
// add any startup code that you want here
}
);

Step 4) Reference the main.js file in the page template


How to copy Oracle JET Container Diagrams from the cookbook into Apex

The JET cookbook demo can be found here. The interactivity in this visualization is charming. We can organize nodes into containers and expand or decrease the container.

Step 1) Copy the html and the js code from the cookbook to our page

Step 2) Add the require.config call

This time we add a base URL.

requirejs.config({
  baseUrl: '#IMAGE_PREFIX#libraries/oraclejet/js',
  // Path mappings for the logical module names
  paths: {
    'knockout': 'libs/knockout/knockout-3.4.0',
    'jquery': 'libs/jquery/jquery-3.1.0.min',
    'jqueryui-amd': 'libs/jquery/jqueryui-amd-1.12.0.min',
    'ojs': 'libs/oj/v2.2.0/min',
    'ojL10n': 'libs/oj/v2.2.0/ojL10n',
    'ojtranslations': 'libs/oj/v2.2.0/resources',
    'text': 'libs/require/text',
    'promise': 'libs/es6-promise/es6-promise.min',
    'hammerjs': 'libs/hammer/hammer-2.0.8.min',
    'signals': 'libs/js-signals/signals.min',
    'ojdnd': 'libs/dnd-polyfill/dnd-polyfill-1.0.0.min',
    'css': 'libs/require-css/css.min',
    'customElements': 'libs/webcomponents/CustomElements.min',
    'proj4': 'libs/proj4js/dist/proj4'
  },
  // Shim configurations for modules that do not expose AMD
  shim: {
    'jquery': {
      exports: ['jQuery', '$']
     }
    },

// This section configures the i18n plugin. It is merging the Oracle JET built-in translation
// resources with a custom translation file.
// Any resource file added, must be placed under a directory named "nls". You can use a path mapping or you can define
// a path that is relative to the location of this main.js file.
    config: {
        ojL10n: {
            merge: {
                //'ojtranslations/nls/ojtranslations': 'resources/nls/myTranslations'
            }
        }
    }
});

Step 3) Find out why it is not working yet

The only remaining ressource that could not be loaded should be the diagramLayouts/DemoContainerLayout.js file. The reason is simple. This file is not included in the base zip file. However we can get it directly from the JET cookbook page.

Firstjet_diagram_launch_standalone we open the cookbook in standalone mode. There is a button in the upper right corner that helps us to do so.

Then we inspect the network files again and locate the DemoContainerLayout.js. We can simply copy the address and store the file to our system

jet_diagram_copy_layoutfile


Step 4) Copy and integrate the layout file

To integrate this layoutfile into our page I choose a slightly different approach. This is not a file that might be relevant for a default Oracle JET installation. Instead I’d like to add it specifically to my application. In this way I can modify the file and influence the behaviour of my diagram without changing anything for other applications.

So we upload it as a static application file (in my case with a directory “oraclejet”).

And we reference the file directly in the require call. Here the suffix “.js” is important. It tells require that this is a direct file reference and not an alias name for a previously defined ressource.

require([‘ojs/ojcore’, ‘knockout’, ‘jquery’, ‘#APP_IMAGES#oraclejet/DemoContainerLayout.js‘,
‘ojs/ojknockout’, ‘ojs/ojbutton’, ‘ojs/ojdiagram’], function(oj, ko, $, layout) { …


Using Oracle JET Diagrams with container layout

An OracleJet diagram is essentially a graph. It consists of nodes and links between the nodes. The container diagram has the additional posibility to organize nodes into a hierarchy. Other layouts have similar possibilities but choose to render it completly different.

Which layout to use is configured in the attributes of the ojDiagram component (View) and inside the javascript Model.ojet_diagram_layout1ojet_diagram_layout2

The container layout has only very limited drawing possibility. Nodes are rectangles and links are lines.

The main nodes (containers) are always drawn horizontically from left to right. Child nodes are always drawn vertically  from top to bottom and inside their parent container. All nodes that have child nodes are considered containers and can potentially be expanded or collapsed.

Links that connect nodes that are side by side are attached to the left or right side of the nodes. Links that connect nodes that are  above or below each other connect to the top and bottom part of a node.

This very simple drawing approach allows for some nice small visualizations. For example we can easily present process flows with that. If we want to draw huge networks, then another layout will be more appropriate.

How to change descriptions

Nodes have several properties that can be set. A complete list can be found in the ojDiagram doc.

  • id ==> will uniquely identify a node. It will also be used as StartNode and EndNode in the link properties.
  • label ==> the text that is printed inside the node.
  • shortDesc ==> a small description that is shown as a tooltip when hovering over a node

The cookbook uses a small function to simplify node creation. But we can also create a node using direct json syntax.

this.nodes.push({
id: "id",
label: "label",
shortDesc: "shortDesc",
nodes: null
});


How to color the nodes

All nodes have a default style. The default is a kind of greyish background. We can change the backgroundStyle property for our node.

this.nodes[0].nodes[0].nodes[0].backgroundStyle = 'height:20px;width:60px;
border-color:#444444;background-color:#00FF80;border-width:.5px;
border-radius:8px';

This colors the first child of the first child in the first container to green and rounds the corners.

We can also simply set the background color, without setting all the other properties. For example for the second child in the first container.

this.nodes[0].nodes[1].backgroundStyle = "background-color:red";

It is possible to add images or shapes to our diagram. We can position them in the middle, left or right inside a node. This line will put a small yellow “human” in node N1.

this.nodes[1].icon = {width: 10, height: 10, halign: "right", 
shape: "human", color:"yellow", borderColor:"grey"};

The following shapes are predefined.

square, plus, diamond, triangleUp, triangleDown, 
human, rectangle, star, circle

It is possible to create custom shapes by providing an SVG path. Or we can add images instead of a shape. However this post is to small to explain that in more detail.

Next I show how to create a custom gradiant fill. There are two steps to do so.
First create the SVG-Fill-Gradient

<svg height="0" width="0">
    <defs>
      <linearGradient id="gradient" x1="0%" y1="100%">
        <stop offset="0%" style="stop-color: #66ccff"></stop>
        <stop offset="80%" style="stop-color: #0000FF"></stop>
      </linearGradient>
    </defs>
  </svg>

then add this gradient to the node.

this.nodes[0].containerStyle = {fill: "url(#gradient)"};

And the combined result looks like this. It certainly is not pretty, but it shows what is possible using a little imagination.

ojet_diagram_colored

Further readings: JET custom shapes and image markers

The source code for this coloring example can be copied into the JET cookbook page.

The HTML part

<div id='diagram-container>
<svg height="0" width="0">
<defs>
		<linearGradient id="gradient" x1="0%" y1="100%">
<stop offset="0%" style="stop-color: #66ccff"&gt;</stop>
<stop offset="80%" style="stop-color: #0000FF"&gt;</stop>
</linearGradient>
</defs>
</svg>
<div id="diagram" data-bind="ojComponent: {
component: 'ojDiagram',
layout: layoutFunc,
animationOnDataChange: 'auto',
animationOnDisplay: 'auto',
maxZoom:2.0,
selectionMode: 'single',
styleDefaults : styleDefaults,
nodes : nodes,
links : links,
expanded: expanded
}"
style="max-width:800px;width:100%; height:600px;"></div>
</div>

The javascript part


require(['ojs/ojcore', 'knockout', 'jquery', 'diagramLayouts/DemoContainerLayout',
'ojs/ojknockout', 'ojs/ojbutton', 'ojs/ojdiagram'], function(oj, ko, $, layout) {
function model(data) {
var self = this;
self.layoutFunc = layout.containerLayout;
function createNode(id, nodes) {
return {
id: id,
label: id,
shortDesc: "Node " + id,
nodes: nodes ? nodes : null
};
}
function createLink(id, startId, endId) {
return {
id: id,
startNode: startId,
endNode: endId,
shortDesc: "Link " + id + ", connects " + startId + " to " + endId
};
}
this.expanded = ['N0', 'N00'];
this.nodes = [], this.links = [];
var childNodesN00 = [createNode("N000"), createNode("N001")];
var childNodesN0 = [createNode("N00", childNodesN00), createNode("N01"), createNode("N02")];
var childNodesN2 = [createNode("N20"), createNode("N21"), createNode("N22")];
this.nodes.push(createNode("N0", childNodesN0));
this.nodes.push(createNode("N1"));
this.nodes.push(createNode("N2", childNodesN2));
this.nodes.push(createNode("N3"));

this.nodes[0].nodes[0].nodes[0].backgroundStyle = 'height:20px;width:60px;border-color:#444444;background-color:#00FF80;border-width:.5px;border-radius:8px';
this.nodes[0].nodes[1].backgroundStyle = "background-color:red";
this.nodes[1].icon = {width: 10, height: 10, halign: "right", shape: "human", color:"yellow", borderColor:"grey"};
this.nodes[0].containerStyle = {fill: "url(#gradient)"};

// disable selection on some containers
this.nodes[0].selectable = 'off';
this.nodes[0].nodes[0].selectable = 'off';

// create the links
this.links.push(createLink("L0", "N2", "N3"));
this.links.push(createLink("L1", "N1", "N21"));
this.links.push(createLink("L2", "N1", "N22"));
this.links.push(createLink("L3", "N000", "N1"));
this.links.push(createLink("L4", "N001", "N1"));
this.links.push(createLink("L5", "N02", "N1"));
this.links.push(createLink("L6", "N000", "N001"));

this.styleDefaults = {
nodeDefaults: {
containerStyle: "border-color:#abb3ba;background-color:#f9f9f9;border-width:.5px;border-radius:1px;padding-top:20px;padding-left:10px;padding-bottom:10px;padding-right:10px;",
labelStyle: "color:#252525;font-size:8px;font-family:'Helvetica Neue', Helvetica, Arial, sans-serif;font-weight:normal;font-style:italic",
backgroundStyle: 'height:20px;width:60px;border-color:#444444;background-color:#f9f9f9;border-width:.5px;border-radius:1px',
icon: null
},
linkDefaults: {startConnectorType: "circle", endConnectorType: "arrow"}
};
}
$(document).ready(
function() {
ko.applyBindings(new model(),
document.getElementById('diagram-container'));
}
);
});

How to modify links

Modifing links is very similiar to modifing nodes.One main difference however is the definition of the “arrows” on each side of the link. Usually we want to have all links look the same. So instead of changing the properties of each single link, we just switch the default behaviour.

The following line will make the links look like arrows.

linkDefaults: {startConnectorType: "none", endConnectorType: "arrow"}

Also for static diagrams I prefer to give each link a proper description (shortDesc).

How to add interactivity

Back to our apex application.The goal here is to click on a node (or a link) and to show a specific Apex region that corresponds with the selection.

First we allow to select a node. The diagram layout can do “single” or “multiple” selections. To allow this, we add the selectionMode: ‘single’ property to our view. And since we want to work with the selected parts later, we also add selection: selectedNodes.

This selectedNodes needs to be defined in the nodeProperty.

The we prepare our apex page and put some “apex connector logic” in place.

We create a region for each node that we want to interact with.

The region gets a static id R_DETAILS_XXX where XXX is the ID of the node and a custom attribute

style="display: none;"

As a result we know the ID of each region and the region will be rendered but not displayed. With that we add a small function showDetails to the page. It will show one region and hide another (the previous) one.


function showDetails(showNodes,hideNodes) {
 console.log("ShowDetails="+showNodes);
 if (hideNodes!==""){
 $("#R_DETAILS_"+hideNodes).hide();
 };

$("#R_DETAILS_"+showNodes).show();

}


The JET and knockout binding will then be done using the optionChangeproperty.

We add a function to react on the change of a selection. The “value” and the “previousValue” will then hold the ID of the node (or link). If we chose to do multiple selections it can be an array of nodes.

Html

<div id="diagram" data-bind="ojComponent: {
component: 'ojDiagram',
layout: layoutFunc,
selection: selectedNodes,
selectionMode: 'single',
styleDefaults : styleDefaults,
nodes : nodes,
links : links,
optionChange: diagramOptionChange
}"
style="max-width:800px;width:100%; height:600px;">
</div>

Javascript


// set default selection

this.selectedNodes = ['N000'];

// disable selection on some containers
 this.nodes[0].selectable = 'off';
 this.nodes[0].nodes[0].selectable = 'off';

self.diagramOptionChange = function (event, data) {
 console.log("optionchanged="+data.option);
 if (data['option'] == 'selection') {
   showDetails(data['value'], data['previousValue']);
 }};


Further reading:

Data vizualization blog: A guide to diagrams (part9)


Start to develop in APEX 5.1, you will gain at least an hour a day!

$
0
0
Yesterday APEX 5.1 (5.1.0.00.43) was installed on apex.oracle.com.
This means that you can start developing your apps in APEX 5.1 from now on. Unlike the early adopter releases (apexea.oracle.com) you can develop your apps on apex.oracle.com and later export them and import in your own environment once the on-premise version of APEX 5.1 is available.

APEX 5.1 is again a major update behind the scenes. The page processing is completely different from before; where previously full page reloads were done, now there's much more lightweight traffic and only necessary data is send across.

The big features in this new release are the introduction of Interactive Grids, which is both a successor for Interactive Reports as for Tabular Forms. The other big feature is the integration of Oracle JET, which you see mostly in the data visualisation (charts) part of APEX, but more components will probably follow in future versions. Although those two features addresses the most common issues we previously had (outdated tabular forms and charts), APEX 5.1 brings much more than that. Equally important for me are the "smaller" improvements which makes us even more productive. Below you find some examples...

When creating a new application, the login page is immediately a great looking page:


Previously in APEX 5.0 you had to adapt the login page, see my blog post Pimping the Login Page.

When you want your item to look like this:


APEX 5.1 has now a template option to display the Pre and Post text as a Block:


Or when you want an icon inside your item, there's an Icon CSS Class option selector which shows the gorgeous looking new handcrafted Font APEX icons:


You could do all the item customisations above in APEX 4.2 or 5.0 too, but it would require custom css and some code, whereas now it's declarative in APEX 5.1.

And there's so much more; ability to switch style by user, new packaged apps, warn on unsaved changes, no reload page on submit etc. features that haven't been talked about much yet, but which before you had to do with a plugin or a lot of custom code and now it's just there.

So those "smaller" features are actually not so small, they are an enormous timesaver and bring your apps in warp-speed to modern and great looking applications.

In the next blog posts I'll go in more detail on some specific features that will gain you at least an hour a day, but in the meantime, embrace APEX 5.1 and start earning those extra hours :)

Calendar Invitations

$
0
0

Calendar Invitations

Calendar Invitations

Calendar invitations are crude text files that follows standards established in RFC 5545. Creating these files from within Oracle PL/SQL requires understanding the rules. Often when putting together a new utility, I think if my youngest days with Lego (yes, my first computer was actually made from Lego. My inspiration came from the 1960s Bat Computer and the rectangular punch cards that could be found in every neighbor’s home.) You snap existing stuff together in new ways (or old ways). The information I read didn’t actually allow me to create an invitation that was accepted by Microsoft Outlook 365.

Step 0 – Read a few blogs & Wing it!

Other blogs and toolkits emphasized the simplicity of these vCalendar text files. I’d write one in NotePadd++, then pull it into MS Outlook 365. I got error messages, most commonly:

“We couldn’t find this meeting in the calendar. It may have been moved or deleted.”

Well, thank you says I. It isn’t in the calendar; you are so right my dear error message. I want to add it to my calendar. No amount of clicking accept helped (nor did the error message).

Step 1 – Actually Research

The calendar format (vCalendar, ics, ical, etc) is defined in RFC 5545. The authoritative references is here: https://icalendar.org/RFC-Specifications/iCalendar-RFC-5545/

Reading the specifications is made more boring by having to click next after each paragraph. Apparently, the Spartan-inspired authors forbade skimming. Even the Oracle document gives the occasional example, I couldn’t find any on their website.

Step 2 – Hack a message that Works

In my Outlook, I found a robust activity on my calendar: it came from outside source; it had a location; it had long description; it had multiple attendees. I exported it as text file with an ics extension. This, when I opened it in NotePad++, clearly looked like the stuff in RFC 5545.

I changed a date and time, saved it and Outlook gladly accept it as a new invitation. It also imported well into Google Calendar.

BEGIN:VCALENDAR
PRODID:-//Microsoft Corporation//Outlook 16.0 MIMEDIR//EN
VERSION:2.0
METHOD:REQUEST
X-MS-OLK-FORCEINSPECTOROPEN:TRUE
BEGIN:VEVENT
ATTENDEE;CN="Barnibus A Rubble";RSVP=FALSE:mailto:barney.rubble@fakeemail.com
ATTENDEE;CN=frederick.flintstone@fakeemail.com;RSVP=FALSE:mailto:frederick.fl
	intstone@fakeemail.com
ATTENDEE;CN="Christina Moore";RSVP=FALSE:mailto:not.here@storm-petrel.com
CLASS:PUBLIC
CREATED:20161216T134426Z
DESCRIPTION:You have been invited to a join.me online meeting \n\nJoin the 
	meeting: https://join.me/************ \n\nOn a computer\, use any browser. 
	Nothing to download. \nOn a phone or tablet\, launch the join.me app and e
	nter meeting code: *********** \n\nJoin the audio conference: \nDial a pho
	ne number and enter access code\, or connect via internet. \n\nBy phone: \
	nUnited States - Los Angeles\, CA   +1.213.***.1066 \nUnited States - New 
	York\, NY   +1.646.***.1990 \nUnited States - Hartford\, CT   +1.***.970.0
	010 \nUnited States - Camden\, DE   +1.***.202.5900 \nUnited States - Tamp
	a\, FL   +1.813.***.0500 \nUnited States - Washington\, DC   +1.***.602.12
	95 \nUnited States - San Francisco\, CA   +1.***.594.5500 \nUnited States 
	- Atlanta\, GA   +1.404.***.8750 \nAccess Code   ***-687-515# \n\nOther in
	ternational numbers available \n\nBy computer via internet: \nJoin the mee
	ting\, click the phone icon and select 'Call via internet'. A small downlo
	ad might be required. \n\nStart time by time zones \n\n\n
DTEND:20161216T160000Z
DTSTAMP:20161207T162659Z
DTSTART:20161216T150000Z
LAST-MODIFIED:20161216T134426Z
LOCATION:join.me/*******\, see conference numbers in the invitation
ORGANIZER;CN="Christina Moore via join.me":mailto:scheduler@****.me
PRIORITY:5
SEQUENCE:2
SUMMARY;LANGUAGE=en-us:Tempest-Bid (CB&I)
TRANSP:OPAQUE
UID:11235811@******rel.com
X-MICROSOFT-CDO-BUSYSTATUS:BUSY
X-MICROSOFT-CDO-IMPORTANCE:1
X-MICROSOFT-CDO-INTENDEDSTATUS:BUSY
END:VEVENT
END:VCALENDAR

Step 3 – Find the rules that matter

My good luck with my Join.Me calendar invitations are that they have a lot of text and a number of attendees. When taking a look at the source text, it became clear that more steps are required then concatenating text.

  1. Lines are Folded (RFC 5545 3.1 Content Lines)
  2. Date/Time are presented as ISO 8601 Format
  3. Time Zones Matter

The iCalendar.org website provides a Validator tool.

3.1 Lines Are Folded

JSON and XML structures identify field name and data. The vCalendar text does not. Rooted firmly in the early days of network computers, it uses the format of the text to discriminate data from not-data. To that end, lines are folded.

  •  A line ends with carriage return/linefeed [CRLF, chr(10) || chr(13), etc].
  • A line must not be longer than 75 bytes
  • If a line is longer, cut it off with a CRLF, start a new line with a horizontal tab [HTAB, chr(9)]

This is discussed here: https://icalendar.org/iCalendar-RFC-5545/3-1-content-lines.html

To preserve your original CRLF you’ll need to replace them with ‘\n’. I observed that the comma character [chr(44)] was also escaped as ‘\,’
So before folding your lines, escape your CRLF and commas.


DESCRIPTION:You have been invited to a join.me online meeting \n\nJoin the 
	meeting: https://join.me/************ \n\nOn a computer\, use any browser. 
	Nothing to download. \nOn a phone or tablet\, launch the join.me app and e
	nter meeting code: *********** \n\nJoin the audio conference: \nDial a pho

Here is a little snippet of code to start with:

function escape_text (
	P_STRING	in clob
) return clob
as
	l_return		clob;
begin
	-- escape the comma character
	l_return := replace(P_STRING, chr(44), '\,');
	l_return := replace(l_return, chr(10), '\n');
	l_return := replace(l_return, chr(13), '');
	return l_return;
end escape_text;

3.2 Date and Time in ISO 8601 Format

This date format is familiar to those who use Oracle PL/SQL to exchange data with JSON. A few quick tricks and Bob’s your uncle:

function ISO_8601 (
		P_DATE		in timestamp,
		P_TIMEZONE	in varchar2
		) return varchar2
as
	l_timestamp		timestamp;
	l_iso_8601		varchar2(60);
begin
	-- convert the date/time to UTC/Zulu/GMT
	select 
		cast(P_DATE as timestamp with time zone) at time zone 'UTC' 
		into
		l_timestamp
	from dual;
	-- convert the format to ISO_8601/JSON format
	if l_timestamp is not null then
		l_iso_8601 := to_char(l_timestamp, g_ISO8601_format);
	else
		l_iso_8601 := null;
	end if;
	return l_iso_8601;
end iso_8601;

Note that the package has a constant for the date format as shown:

  g_ISO8601_format	constant varchar2(30) := 'YYYYMMDD"T"HH24MISS"Z"';

3.3 Time Zone Matter

There is a lot of blah-blah-blah in the protocol about time zones. The easiest solution is to just use UTC. Convert your times to Zulu and be done with it.

select 
		cast(P_DATE as timestamp with time zone) at time zone 'UTC' 
into
		l_timestamp
from dual;

A bit of Code

Step 4 – Write Some Code

First, I don’t like looking at code with a bunch of concatenated strings. So instead, I use substitution strings. I’ll argue you can make updates and changes with less effort too. The only real challenge in finishing the effort is deciding how to handle your list of attendees. That will clearly be data driven, each line of attendees will have to be folded as you build your list. With the list of attendees appropriately formatted, a quick substitution will land them into your calendar invitations (ics text file).

I took the good/source vCalendar text and converted it and put it at the top of the package body.

create or replace package body ical_pkg
as
  g_ISO8601_format		constant varchar2(30) := 'YYYYMMDD"T"HH24MISS"Z"';
  crlf				constant varchar2(2) := chr(13) || chr(10);
	tab			constant varchar2(1) := chr(9);
	vcal			constant varchar2(4000) :=
q'[BEGIN:VCALENDAR
PRODID:-//Oracle APEX//Outlook 16.0 MIMEDIR//EN
VERSION:2.0
METHOD:REQUEST
X-MS-OLK-FORCEINSPECTOROPEN:TRUE
BEGIN:VEVENT
#ATTENDEE_LIST#
CLASS:PUBLIC
#CREATED#
#DESCRIPTION#
#DTEND#
#DTSTAMP#
#DTSTART#
#LAST_MODIFIED#
#LOCATION#
#ORGANIZER#
PRIORITY:5
SEQUENCE:2
#SUMMARY#
TRANSP:OPAQUE
#UID#
X-MICROSOFT-CDO-BUSYSTATUS:BUSY
X-MICROSOFT-CDO-IMPORTANCE:1
X-MICROSOFT-CDO-INTENDEDSTATUS:BUSY
END:VEVENT
END:VCALENDAR]';
	
function escape_text ( ...

I know that the code is not fully functional, they are just hints to encourage exploration.

function event_invite(
	P_EVENT_PK		in number
	) return clob
as
	r_event						bid_event_v%ROWTYPE;
	r_asset						bid_asset_v%ROWTYPE;
	l_select_count		number;
	l_ics							clob;
...
begin
	select sessiontimezone into l_timezone from dual;
	select * into r_event from bid_event_v where event_pk = P_EVENT_PK;
	l_ics				 := vcal;
	l_created 			:= ical_pkg.iso_8601(localtimestamp, l_timezone);
	l_created			:= 'CREATED:' || l_created;
	l_last_modified	 := ical_pkg.iso_8601(localtimestamp, l_timezone);
	l_last_modified	:= 'LAST-MODIFIED:' || l_last_modified;
	l_dtstamp 		:= ical_pkg.iso_8601(localtimestamp, l_timezone);
	l_dtstamp		:= 'DTSTAMP:' || l_dtstamp;
	l_location			:= 'LOCATION:Tempest-Bid';
	l_organizer		:= 'ORGANIZER:CN="Tempest-Bid":mailto:do_not_reply@storm-petrel.com';
	
...

	l_attendees			:= ical_pkg.attendees(P_EVENT_PK);
...

	l_ics		:= replace(l_ics, '#ATTENDEE_LIST#', l_attendees);
	l_ics		:= replace(l_ics, '#CREATED#', l_created);
	l_ics		:= replace(l_ics, '#DESCRIPTION#', l_description);
...

return (l_ics);
end event_invite;

</qed>

The post Calendar Invitations appeared first on Oracle Blog .

Oracle Cloud ERP and APEX PaaS Mashup

$
0
0

Introduction

I have worked with several customers who are struggling to understand how they can extend the UI in Oracle Fusion Apps or Cloud ERP. Tools like OTBI offer options for representing data that is already in the Cloud ERP environment (namely dashboards, infolets and charts). It does not, however, allow you to incorporate mashups of data with other systems.

The solution to this is PaaS. Using Oracle's PaaS offerings, you can embed a custom UI within your Cloud ERP application without your user having to navigate out of Cloud ERP or re-authenticate. Oracle's PaaS solutions, however, are expensive and harder for the traditional Oracle Applications community to understand. We require, therefore, a gateway drug that we can buy cheaply, that we already use and will get us hooked on other PaaS solutions. Enter APEX on the Oracle Exadata Express Service, the Oracle Database Schema Cloud Service or even your own APEX environment (if it is externalized to the internet and running over https).

In this post, I will take you through the basic steps to integrate a simple APEX Report in a new page in Cloud ERP. Do not be fooled by the simplicity of this example, the potential is much farther reaching. This approach opens the door to many other possibilities, including but certainly not limited to:
  • An APEX report in an Cloud ERP tab, showing Salesforce data in real time (Via a Web Service call from APEX to Salesforce)
  • An APEX data entry form in an Cloud ERP tab that allows users to enter data and post it to other systems via web services in APEX (e.g. Salesforce, Concur, on-premise legacy systems etc.)
  • An APEX data entry form in an Cloud ERP tab that displays departmental data from the APEX database mashed up with Cloud ERP data. In this scenario APEX pulls data from Cloud ERP and its local database to present a mashup to the user.

At this stage, I should say the example I am going to outline below is not fully comprehensive. There are a few areas where I would tighten up security (e.g. creating an authentication scheme in APEX) and some steps that were taken for expediency that I might do differently if it were a production application.​

A Teaser Before We get Started

Picture
The finished product

Preparing APEX

 There are a few things you need to take care of on the APEX side to make this work seamlessly.
  • Use the Vista theme, this is the Alta UI used in today's Oracle Cloud Products and fits very well with the Cloud ERP look and feel.
  • Create a Custom Page Template. I took a copy of the standard template 'Minimal - No Navigation' and removed the following items from the new template:
    • Remove <div class="t-Header-branding"> and all the div's between it from the Header.
    • ​Remove: ​#APP_VERSION#,  #CUSTOMIZE#,  #SCREEN_READER_TOGGLE# from the Body.
    • This removes the APEX header, Nav Bar etc. from all our pages. Remember, our pages will be running in a tab within Cloud ERP so we don't need the extra stuff.
  • The mashup will be running in an iframe. To make this work, we need to change an APEX security setting > Edit Application Properties > Security > Browser Security > Embed in Frames = Allow.
  • If you are running on your own server, you will need to import the Oracle Cloud ERP ssl certificate into your database wallet so you can do a call back to Cloud ERP REST and SOAP web services from APEX.

Creating a Demo APEX Page

Now that we have the basics in place, we can create our demo APEX page. Create a new page (page 10) with the following attributes:
  • Page Authentication: Page is Public
    • Note: This is an example of something we do in a demo only. In reality, we would create an authentication scheme.
  • Create a Before Header page processes (more on this below):
    • Name: Parse JWT and Get Username
  • Create a region of type 'Classic Report', enter a SQL query just to get some data returned (e.g. SELECT table_name, status, pct_free, num_rows, avg_row_len FROM all_tables WHERE TABLE_NAME LIKE 'A%').
  • Create a chart region based on the same query.
  • Create the following Page Items:
    • P10_JWT (hidden, value protected = No). This page item will accept the Java Web Token (JWT) from Cloud ERP.
    • P10_JWT_BASE (hidden, value protected = Yes, Session State 'Restricted - may not be set from the browser').
    • ​P10_FUSION_USER (Display Only, Session State 'Restricted - may not be set from the browser')

JWT?

Before I go too much further I should explain where the Java Web Token (JWT) fits in. I will explain how to generate one from Cloud ERP later in the post. The JWT is essentially a token that is generated by Cloud ERP uniquely for your session. The JWT will be passed to APEX in the Query String. The JWT is composed of 3 '.' delimited segments. The first segment is the JWT header, the middle is the actual payload, and the last section is the HMAC256 encoded signature. Each segment is Base 64 encoded.

Here is an example of the middle segment (base 64 encoded):

eyJleHAiOjE0Nzg4MzE1MDAsImlzcyI6Ind3dy5vcmFjbGUuY29tIiwicHJuIjoiRklOX0lNUEwiLCJpYXQiOjE0Nzg4MTcxMDB9
Which un-encoded, looks like this:
{"exp":1478831500,"iss":"www.oracle.com","prn":"FIN_IMPL","iat":1478817100}

It contains the expiration, in Epoch/Unix time format (exp) and the user name (prn). We can use this user name to set context in APEX. But that's not all, the entire JWT can also be used ​to authenticate web service calls back to Cloud ERP (more on that later).

The Page Process (Parse JWT and Get Username)

The page process is going to take care of accepting and decoding the JWT. I have include some code snippets which will be useful when building your own.

Get the JWT from the URL Query String:
  l_query_string  := owa_util.get_cgi_env('QUERY_STRING');

When Cloud ERP calls APEX, it will pass the token as ?jwt=<token> so we have to remove the 'jwt=':
  l_jwt_start_pos := INSTR(l_query_string,'jwt=')+4;
  :P10_JWT_BASE := SUBSTR(l_query_string, l_jwt_start_pos, 10000);

To get the payload from the middle segment of the JWT, we can convert the JWT to a PL/SQL Array:
  l_jwt_arr       := APEX_UTIL.STRING_TO_TABLE(:P10_JWT_BASE, '.');

The payload is in the 2nd row of the array. Finally, we need to un-encode and then the parse the JSON to get the (prn) or username:
  l_prn_json := UTL_ENCODE.TEXT_DECODE(l_jwt_arr(2), 'UTF8', UTL_ENCODE.BASE64);
  APEX_JSON.PARSE (l_prn_json);
  :P10_FUSION_USER := APEX_JSON.get_varchar2 (p_path => 'prn');

Making Sure the JWT is Authentic
At this stage we know the Fusion Username but we could have fabricated a JWT to get us this far. We should make a call back to Cloud ERP, using the JWT as a Bearer token, to make sure the JWT is recognized by Cloud ERP. At time of writing, there is not a REST based 'who am I' type service in Cloud ERP but we can make use of either a HR or Projects REST service which are available in R11 of Cloud ERP.

e.g. End Point for HR employee REST Service: https://<<host>>/hcmCoreApi/resources/latest/emps/1

We know employee id 1 does not exist, but that is not the point. We just need to make sure we don't get a http response of 401 (un-authorized). It is works, we should expect a 404 not found response.

Calling the Cloud ERP REST Service
  l_url := 'https://<<host>>/hcmCoreApi/resources/latest/emps/1';

  -- Set the HTTP Headers and the Token P10_JWT_BASE is derived from our page process above

  apex_web_service.g_request_headers(1).name  := 'Authorization';
  apex_web_service.g_request_headers(1).value := 'Bearer '||:P10_JWT_BASE;
  apex_web_service.g_request_headers(2).name  := 'Content-Type';
  apex_web_service.g_request_headers(2).value := 'application/vnd.oracle.adf.resourceitem+json';

  -- Call the REST Service
  l_clob := apex_web_service.make_rest_request(
        p_url         => l_url,
        p_http_method => 'GET');

  -- Get the HTTP Response Code. 404 means the JWT was valid but the service could not find the employee record (which is fine for our purposes).
  l_http_status_code := apex_web_service.g_status_code;

The Cloud ERP Side

Now that we have an APEX application ready to be called we need to login to Cloud ERP to complete the mashup. There are several steps to this:
  1. Create a new Third Party Application
  2. Create a new Page Integration
  3. Locate the new Page in the Application Structure
  4. Adjust the size of the new Custom Page

Create a new Third Party Application

Navigation
Setup & Maintenance > Pull out the Tray on the Right Side > ​Manage Custom Setup Content > Manage Third Party Applications > Click the Plus Icon to Create a new one

The URL is the base URL to your APEX environment without the trailing '/'
e.g. https://www.example.com/ords

Create a new Page Integration

First, create a new Sandbox, then create the Page Navigation as follows.

Navigation
> Navigator > Tools > Page Integration > Click the 'New Page' button

Enter a Name, select an Icon then select an Application Role for which the new page should be available. Next, click the golden key icon and another popup will appear, at which point, enter the following:
  • For Web Application, select the third-party application created above.
  • For Destination for Web Application, enter the end of the APEX URL as follows:
    • f?p=101:10:::::P10_JWT:
    • Where 101 is the application number and 10 is the page number.
    • The colons are meaningful in APEX URLs so don't miss any out.
  • Finally, enter jwt as the Secure Token Name and then click Save and Close

Locate the Icon for the New Page

To place the icon for our new page on the home page of Cloud ERP, follow these steps:
Navigation
> Navigator > Tools > Structure
Find and Expand 'Sales Performance Aux' and you should see your new page. Click the right Chevron and Select (Top Level). Now click on the Home Page and you should see your new icon.

Adjust the Size of the New Page

You may want to adjust the height and width of the iframe. To do this, click the icon for your new page which is located on the Home Page. When the page opens, navigate to > Your User Name > Customize Pages. Size the window the way you want then click Close.

Conclusion

The above steps may seem complex at first glance. But when you consider we just integrated a highly sophisticated web based PaaS service (APEX) with Oracle Fusion Apps / Cloud ERP, it's pretty amazing. Also, don't forget that APEX itself has the ability to consume SOAP and REST services as well as host REST web services. That added to the native database scheduling features may be all you need for integrations. But thats not all folks, with the Exadata Express service, prices start at just $175/month for 20GB storage, 3GB PGA and 3GB SGA for a service that requires no configuration.

This all goes to show how versatile, powerful (and sometimes underrated) APEX in the Cloud is. In my opinion the Cloud will be APEX's coming of age and I expect many more great things to come.

Item Toggle

Upgrading the Universal Theme

$
0
0
Back when APEX 5.0 was released, these forward thinkers at the development team installed a feature to verify your Universal Theme against the one defined in the repository.

There hasn't really been anything to verify against, until now.

There are a number of changes to the Universal Theme, and one way to explore these changes is to check out what's reported under the Verify button in the Theme definition.


Though unfortunately on apex.oracle.com I'm still getting the same error
ORA-20001: Unable to subscribe to report template.
ORA-00040: active time limit exceeded - call aborted


Errors aside, this facility all planned, of course, to minimise the impact theme upgrades have caused in the history of APEX. And no doubt used internally while they were developing UT in the first place.

As Patrick Wolf points out in this forum post, some features aren't borne out of the IDE upgrade alone, but are found with the theme upgrade. This includes RTL functionality.

So some thoughts that come out of reviewing the comparison:

  • A couple of new default styles, to go along with Slate. Nice.
  • Two new region templates to explore - Content Block and Blank with Attributes (No Grid)
  • Every other template has been touched in some way. It would be nice to see a diff of the updates.

If your Universal Theme is still locked, you just refresh your theme definition and your application should continue to work wonderfully.

Take care if you have any customisations or extensions, regression test as necessary. We've tried to minimise ours so it will be interesting to explore when 5.1 becomes generally available.

If you want to learn more about the features of the Universal Theme, check out the sample application, which also got a wicked upgrade, always available at
apex.oracle.com/ut
There are some awesome tools in the reference section alone.

Handling client-side messages in APEX 5.1

$
0
0
You may noticed that in APEX 5.1 there's new JS namespace apex.message that is used to handle client-side messages.

Unfortunately, there's no documentation for it yet so I'll try to make a quick introduction to some features that you can use.

Important notice: all examples are made in APEX 5.1.0.00.43 which is currently only available on apex.oracle.com. Some features may change in production version.

Most important features/function in new JS library that you can use are:
  • apex.message.showPageSuccess - function to dynamically display standard APEX success message,
  • apex.message.hidePageSuccess - function that enables you to hide page success message
  • apex.message.showErrors - function to display page or inline error messages
  • apex.message.alert - function to call new APEX alert dialog
  • apex.message.confirm - function to call new APEX confirm dialog

Examples of how to the functions from above are available here.

Be careful when you use apex.message.alert or apex.message.confirm because they are a bit different than build-in browser functions alert() and confirm(). They don't block JS execution so you have to put code following the call into the callback function. For example, if we use following code:

apex.debug.log('Before APEX alert');
apex.message.alert('My Alert Message'
, function(){
apex.debug.log("You've pressed ok! ");
}
);
apex.debug.log('After APEX alert');

the output in JS console (before we click Ok button on alert dialog) will look like this:


And after you press Ok button it will look like this:

So, as you may see, JS code following the apex.message.alert call will execute before we even press Ok button (unlike calling browser's alert() function).

There are some additional advanced features available in new JS library like registering your own templates by calling apex.message.registerTemplates. You can also define custom hooks on some message events like beforeShow or beforeHide (see apex.message.setThemeHooks).

Go, explore and enjoy!

ITTage 2016 - Tag 2 - 14.12.2016

$
0
0
Der zweite Tag startete um 9Uhr mit einer Keynote über Security in Verbindung mit der Cloud. Ein großer Teil des Vortrags bestand darin, klar zu machen, dass Sicherheitsprobleme beim Anschluss an die Cloud nicht unbedingt nur in der Gefahr, dass die Daten in der Cloud geklaut werden, sondern auch dass Angreifer aus der Cloud ins Firmennetz kommen können. Später wurden auch noch Optimierungen im Netzwerk angesprochen, aber insgesamt wirkte der Vortrag inhaltich wie etwas von allem.

Von 10-12 hatte ich dann meine beiden Vorträge. Im ersten Vortrag habe ich vorgestellt wie man dynamisch in größeren Datenmodellen effektiv und zur Laufzeit mittels Metadaten Daten in der Datenbank vergleichen kann. Die Daten werden dabei nicht einfach in einem Report dargestellt, sondern mit Kontextinformationen angereichert, so dass ein Endbenutzer in seiner Anwendung sehen kann wo Daten verändert wurden.
Im zweiten Vortrag gings dann um CI/CD mit Oracle Datenbanken. Mir war von anfang an klar, dass ein 45Minuten Slot kaum dafür ausreichen kann, da ich Schulungen zu dem Thema bei mehreren Firmen gegeben habe, wo man mindestens einen ganzen Workshoptag dafür braucht. Nichtsdestotrotz habe ich die Themen Skripting, Infrastruktur, Versionierung, Abhängigkeitsbehandlung, Prozesse & Jenkins einmal in kürze vorgestellt. Auch wenn hier und da ein paar Details nicht behandelt wurden, so konnten die Teilnehmer sich ein Bild davon machen, was man alles für eine Automatisierungsunterstützung in der Datenbankentwicklung machen kann.

Um 12Uhr gings dann mit dem Thema "Vom Monolithen zu Microservices" weiter. Eingestiegen ist der Vortrag mit einer Analyse eines vorhandenem Monolithen. Interessant war dabei ein Tools namens Structure101 mit dem man eine vorhandene Software analysieren kann und ermitteln, welche Klassen/Objekte vorhanden sind, wie diese verknüpft sind und ob es Code gibt der nicht benötigt wird. So wie es aussieht kann die Software aber nur C/C++ analysieren. Weiter wurde dann ein Framework namens Hysterix vorgestellt, welches zum Testen der Fehlertoleranz eingesetzt werden kann. Das Tool wurde von den Netflix Machern erstellt und ist auf GitHub verfügbar. Der Ansatz ist, dass man eine Anwendung aus Microservices testet und guckt wie diese mit dem Ausfall von Komponenten und Verzögerung bzw. Fehlinformationen umgehen kann. In einer Anwendung bestehend aus Microservices wird versucht so gut wie alles was sich trennen lässt als eigene Dienste laufen zu lassen, selbst die Oberfläche ist entkoppelt vom Rest. So lassen sich die einzelnen Komponenten getrennt mit mehreren Teams entwickeln, aber es kommt zwangsläufig zu Coderedundanzen. Beim "zerschneiden" eines vorhandenen Monolithen ist es dabei sehr schwierig direkt beim ersten Mal die richtigen Schnitte zu machen und so kann eine Umstellung auch schon mal länger dauern bzw. mehreren Anläufe benötigen. Zuletzt wurde noch die "Simian Army" vorgestellt, die eine gesamte Anwendung mit beliebigen Eingaben testet und einzelne Services lahmlegt. Im Prinzip wird so ein Stresstest gegen das Hysterix Framework durchgeführt und man guckt sich in den Logs und an der Anwendung an wie Robust diese läuft.

Nach ein paar Gesprächen zur Mittagspause gings um 14Uhr weiter mit dem Thema Microservices. Diesmal zum Thema Deployment von Microservices. Am Beispiel vom Otto Webshop wurde von Guido Steinacker vorgestellt wie dort die Micrsoservices geschnitten und erstellt wurden. Direkt beim Einstieg wurde unterstrichen, dass pro Tag bis zu 100 Deployments auf der Produktion stattfinden und dies ohne zu lasten der Qualität zu gehen. Interessant dabei ist, dass Anpassungen die so in großer Zahl an einem Tag eingeführt werden mittels "feature Toggle" nur für einen Teil der Endbenutzer aktiviert wurden. So kann man ein Feature einbauen und nur bei 1% der Benutzer die Auswirkung beachten. Ähnlich wie Netflix hat auch Otto eine Menge von Tools geschaffen die auf GitHub zur Verfügung stehen. JLineUp, JSMine, Gatekeeper und JezHumble sind nur ein paar Tools die teils selber entwickelt wurden oder in der Microservice Entwicklung eingesetzt werden.

Nachdem das Hysterix Framework sich interessant anhörte habe ich um 15Uhr dann die Vortrag "Resilience mit Hysterix" angehört. Leider stellte sich schnell heraus, dass das Framework in Java geschrieben ist und nur in Java einsetzbar ist.

Um 16 Uhr hab ich dann zusammen mit Dietmar ein wenig über PL/SQL Installationsskripte und Optimierungen in diesem Bereich geredet bevor es dann wieder weiter ging.

Um 17Uhr gabs dann die zweiten Vortrag von Guido Steinacker zu Microservices. Dabei wurde vor allem genauer beleuchtet wie eine Oberfläche wie der Otto Webshop auch aus einzelnen Microservices erstellt wird. Aus meiner Sicht wirkt es schon etwas verstörrend wie man jede Komponente wie Navigation, Suche, Empfehlungen, Artikeldetails alles in einzelnen Teams entwickeln lässt und trotzdem eine stimmige Gesamtanwendung erhält. Ein guter Ansatz bei einer solch "verteilten" UI war auf jeden Fall wie AJAX einzusetzen um eben Inhalte die getrennt sind auch effektiv nachzuladen. Innerhalb von Otto wird auf Pair Programming gesetzt, was sich aus meiner Sicht gut anhört, aber natürlich die doppelten Ressourcen bindet.

 Im 18Uhr Slot habe ich dann noch ein paar Unterhaltungen geführt  und dann um 19Uhr als abschließenden Vortrag mich Elchen und Elefanten gewidmet. Hier gabs zum Glück auch schon ein Bier zum Vortrag, den nach 10Stunden war man doch schon etwas "durch" im Kopf. Der letzte Vortrag behandelte dabei die Problematik, wie man innerhalb von Firmen mit Problemen umgehen kann die von anderen Personen ausgehen, welche meist 1-2 Gehaltsklassen über einem sind. Hier wurden eine Menge Beispiele geliefert, wie ein solches Problem aussehen kann, und was es für Verluste mit sich bringt, wenn man solche Probleme nicht löst. Der Vortrag war dabei zwar gut vorgetragen, aber brachte nicht so wirklich Lösungen mit sich.

Danach konnte man sich mit Bier und Fingerfood in kleiner Runde gemütlich unterhalten und müde ins Bett fallen.

APEX 5.0 Desktop Universal Theme vs Mobile Theme

$
0
0

APEX 5.0 Desktop Universal Theme vs Mobile Theme I was recently asked by a customer to create a small application for use on mobile devices, to record attendance at certain events. Developing in APEX version 5.0, I initially built the application using a Mobile application, but for comparison also built the same functionality using a

The post APEX 5.0 Desktop Universal Theme vs Mobile Theme appeared first on Oracle Application Express (APEX) Consultants, developers and APEX training courses UK.

Get a Taste of Kscope17 in San Antonio!

$
0
0
Join the ODTUG Board of Directors and local ODTUG members for a meetup at the JW Marriott San Antonio Hill Country, the location of Kscope17. We're excited to share a sample of what you'll experience if you attend Kscope17, which is all about great content and having fun with some of the smartest pe

SVG in APEX: Best Practices

$
0
0
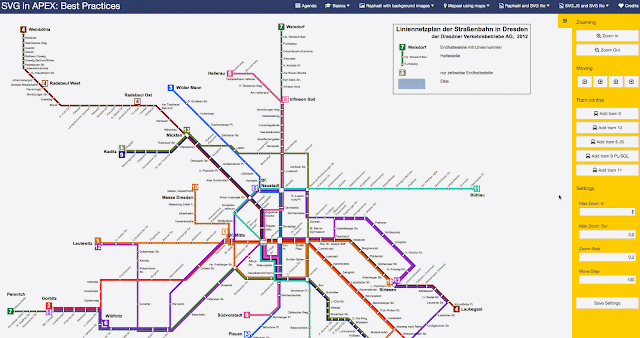
In the last 8 month I was working on a new version of my SVG (Raphaël) example application. Of course I have a job (freelancer) and I have children. So the time to spend was diminished on only a few hours per week mostly on my way to work.
Some of the results were presented at the Swedish Oracle meetup in Summer '16. But the final application was made for DOAG 2016.

What leads me to an important point. To have the honor to present somewhere means for me also a passion to learn something new, create something new and share it with others to become a better developer. You may think 8 month of free time spend for a simple presentation is stupid but now I'm able to propose new business solutions to my customers which I didn't even thought were so easy to achieve.

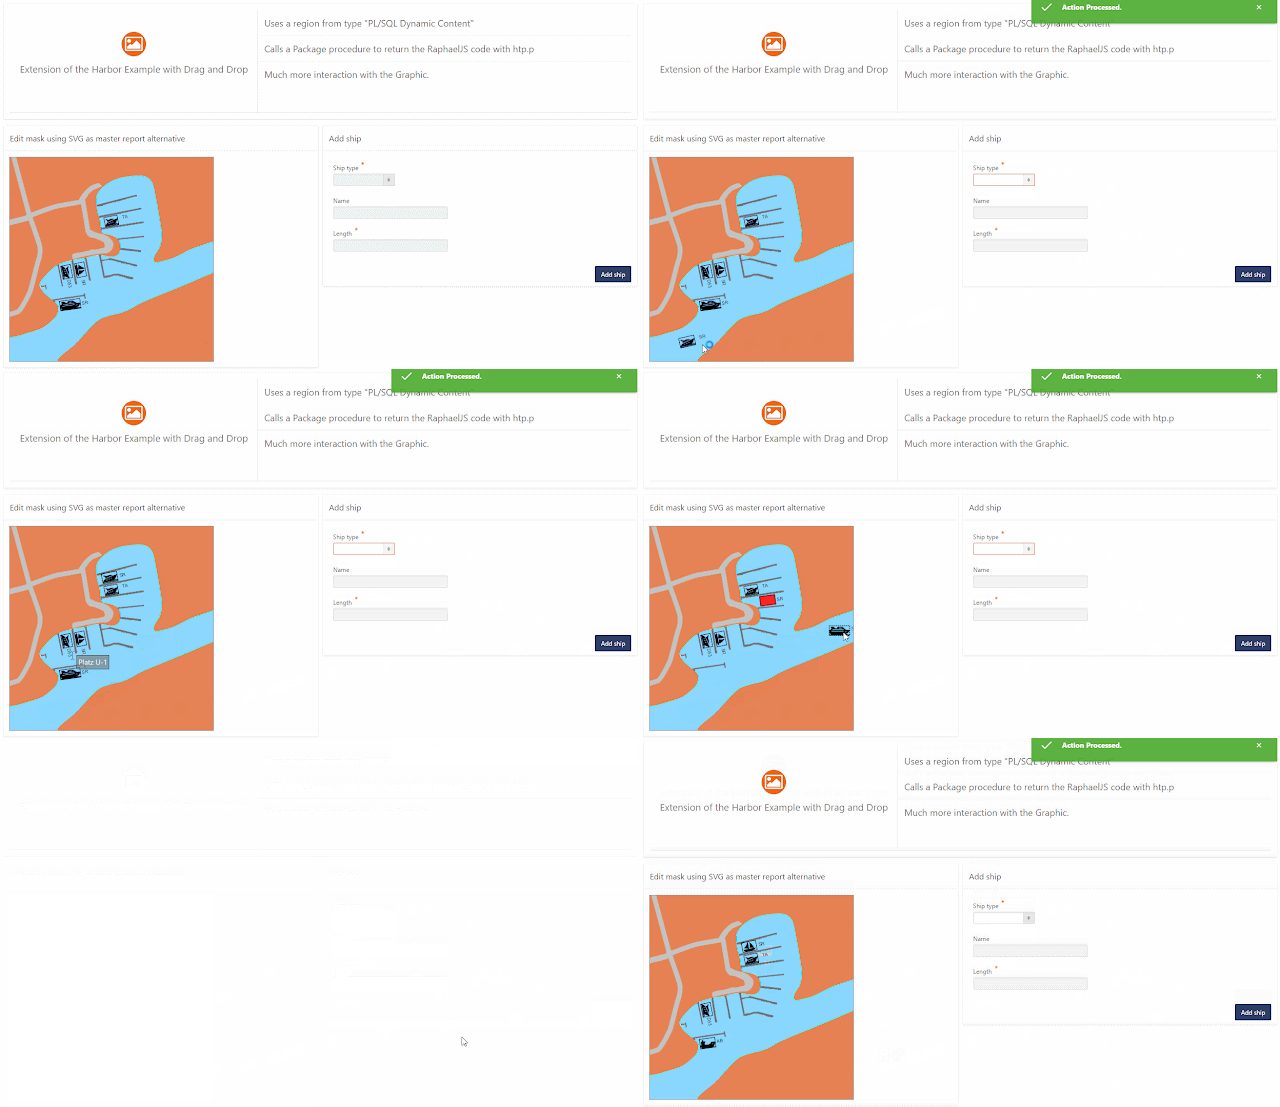
And this is not all. One month before DOAG I was talking to a colleague "Sebastian Reinig" from another consulting company (Syntegris). A young men still studying for master grade and with a lot of passion towards Oracle APEX. He explained me that he worked on an APEX project using my former SVG solution from back in '14 and he enhanced my code by adding cool new features. (e.g. drag and drop in the harbor).
I mean those features were fitting perfectly in my example application. So I asked him to join my presentation at DOAG and show others what he was doing. An he did it. He added a new variant of my old example and helped me finishing the application.

That is why we should be presenting somewhere:
To become better by doing something new.
To become better by sharing your ideas with others and even get inspired by their ideas.

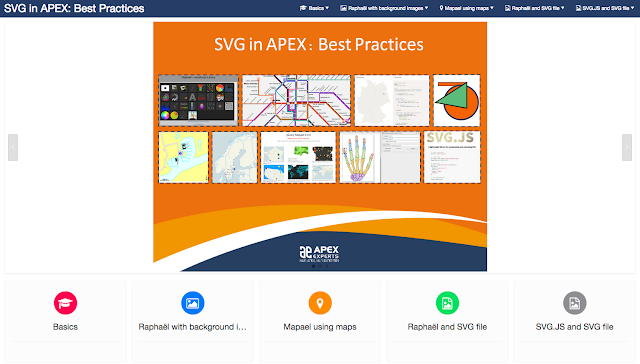
The result of this passion is the "SVG in APEX" application.


Download: github.com/tobiasarnhold/svg-in-apex
Example application URL: apex.oracle.com/pls/apex/f?p=SVG_IN_APEX
User: demo
Password: demo

Examples:

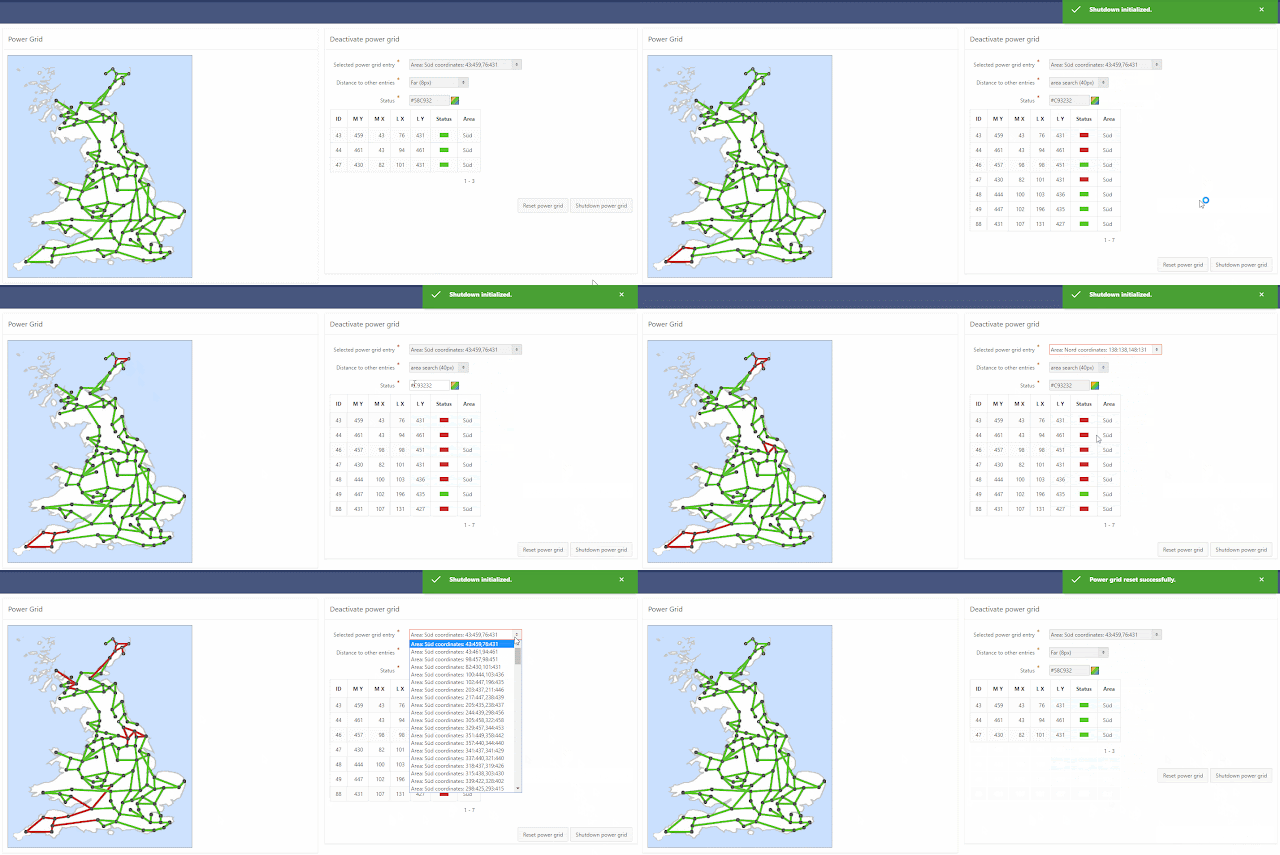
 1. Power grid (Great Britain including their main electricity pipelines)


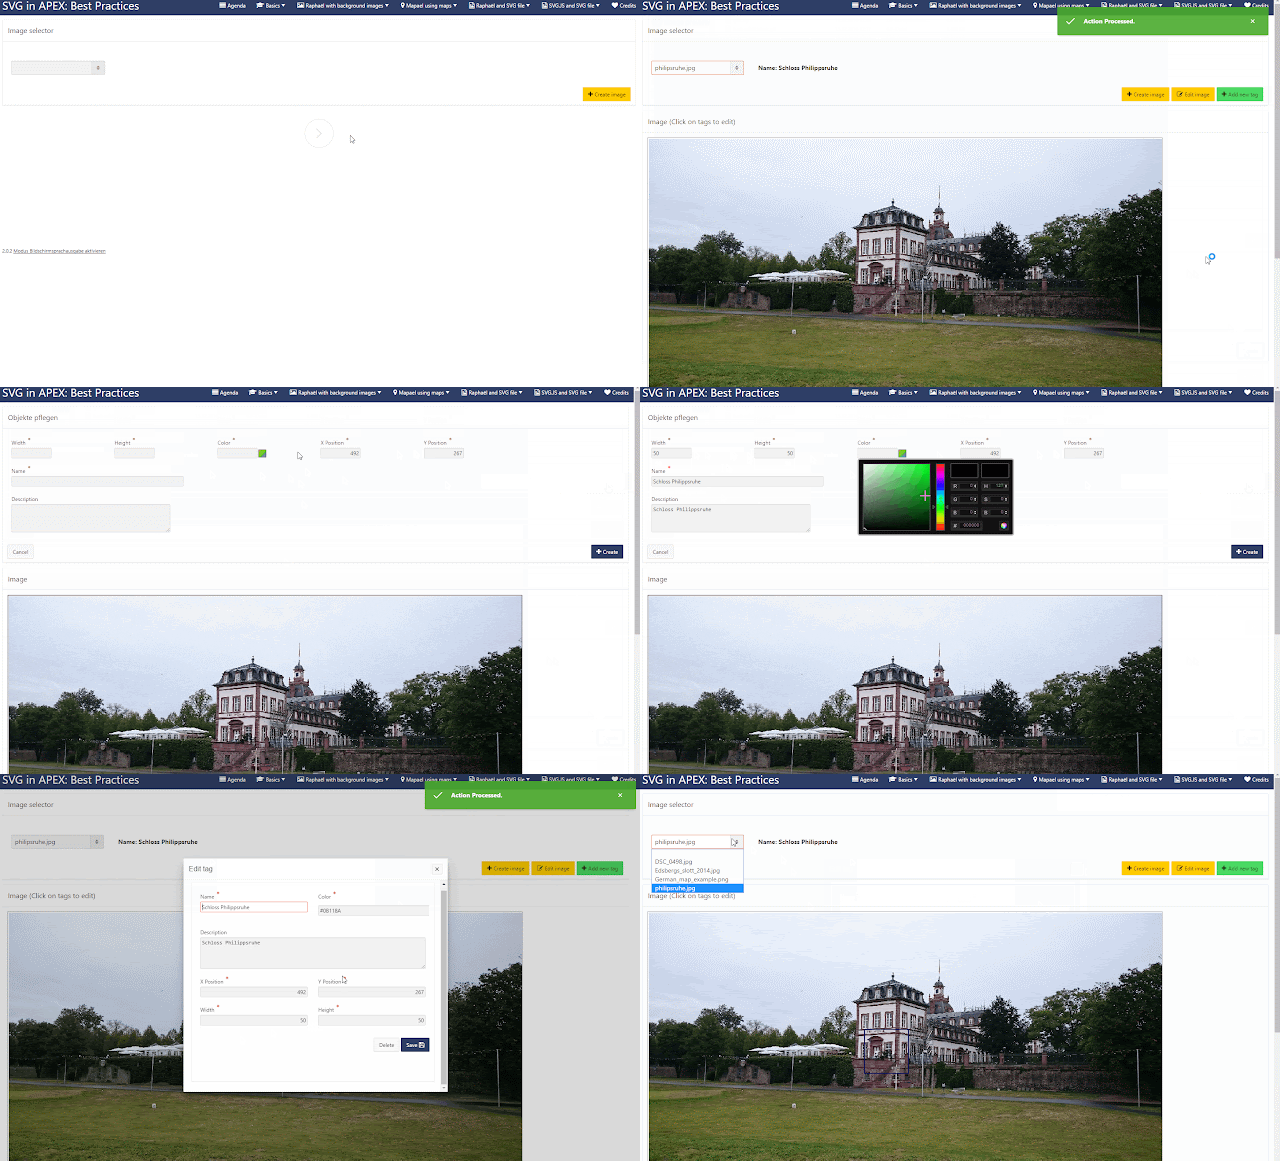
2. Image tag editor


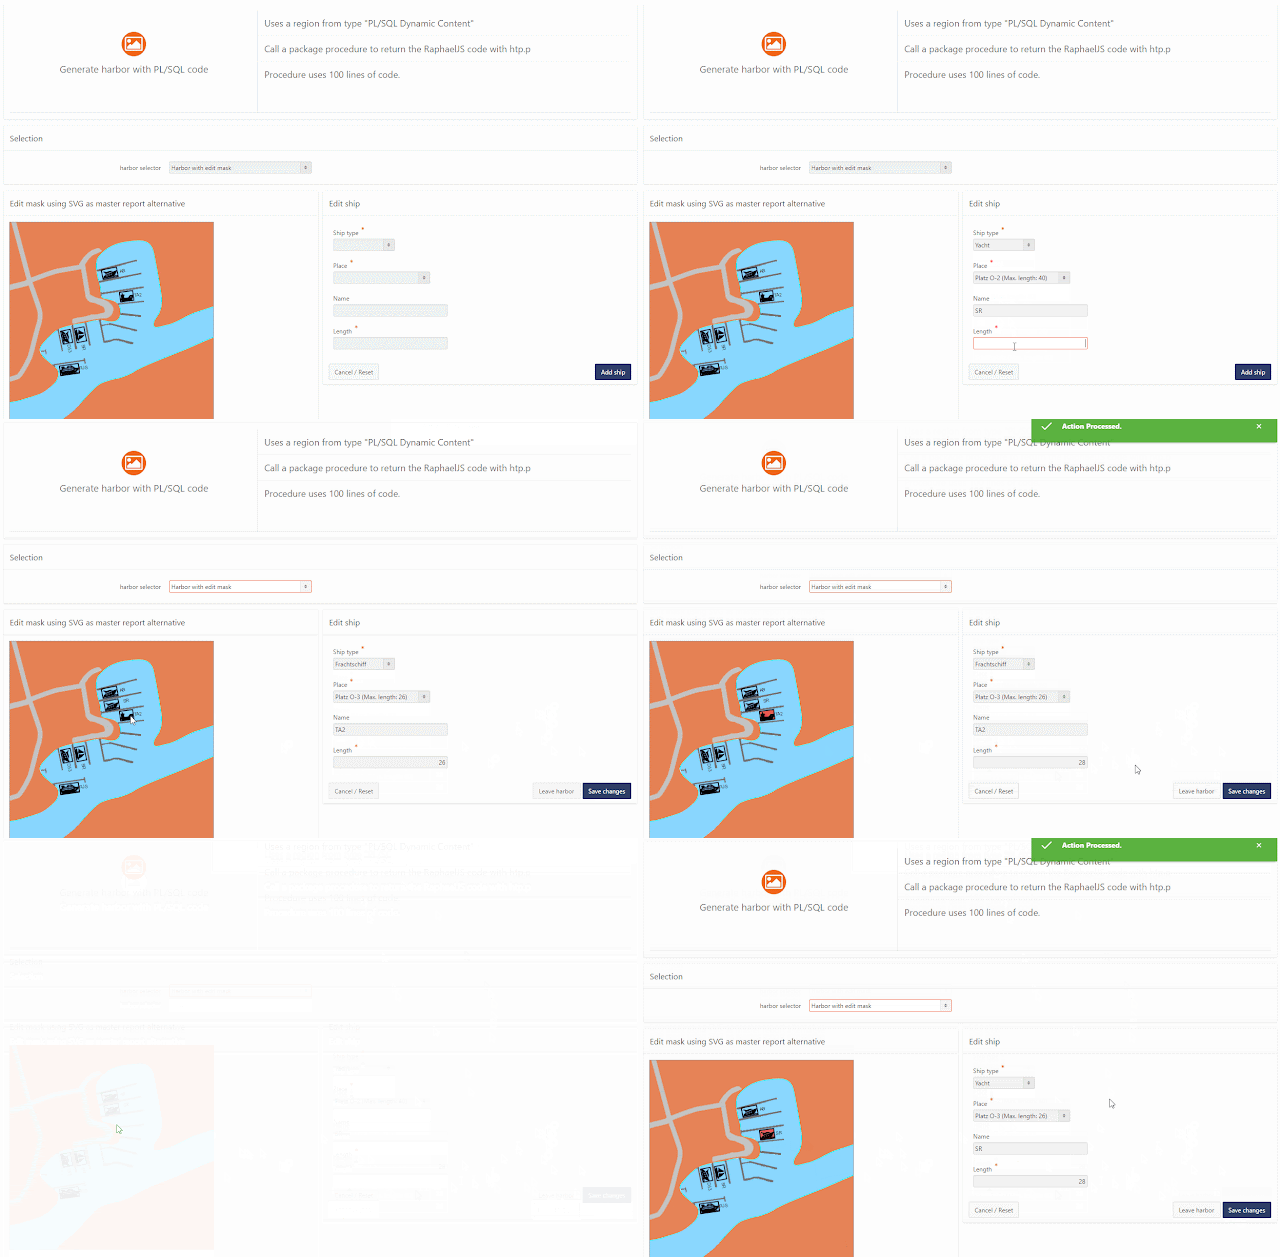
3. Harbor - Edit mask


4. Harbor - Drag and Drop


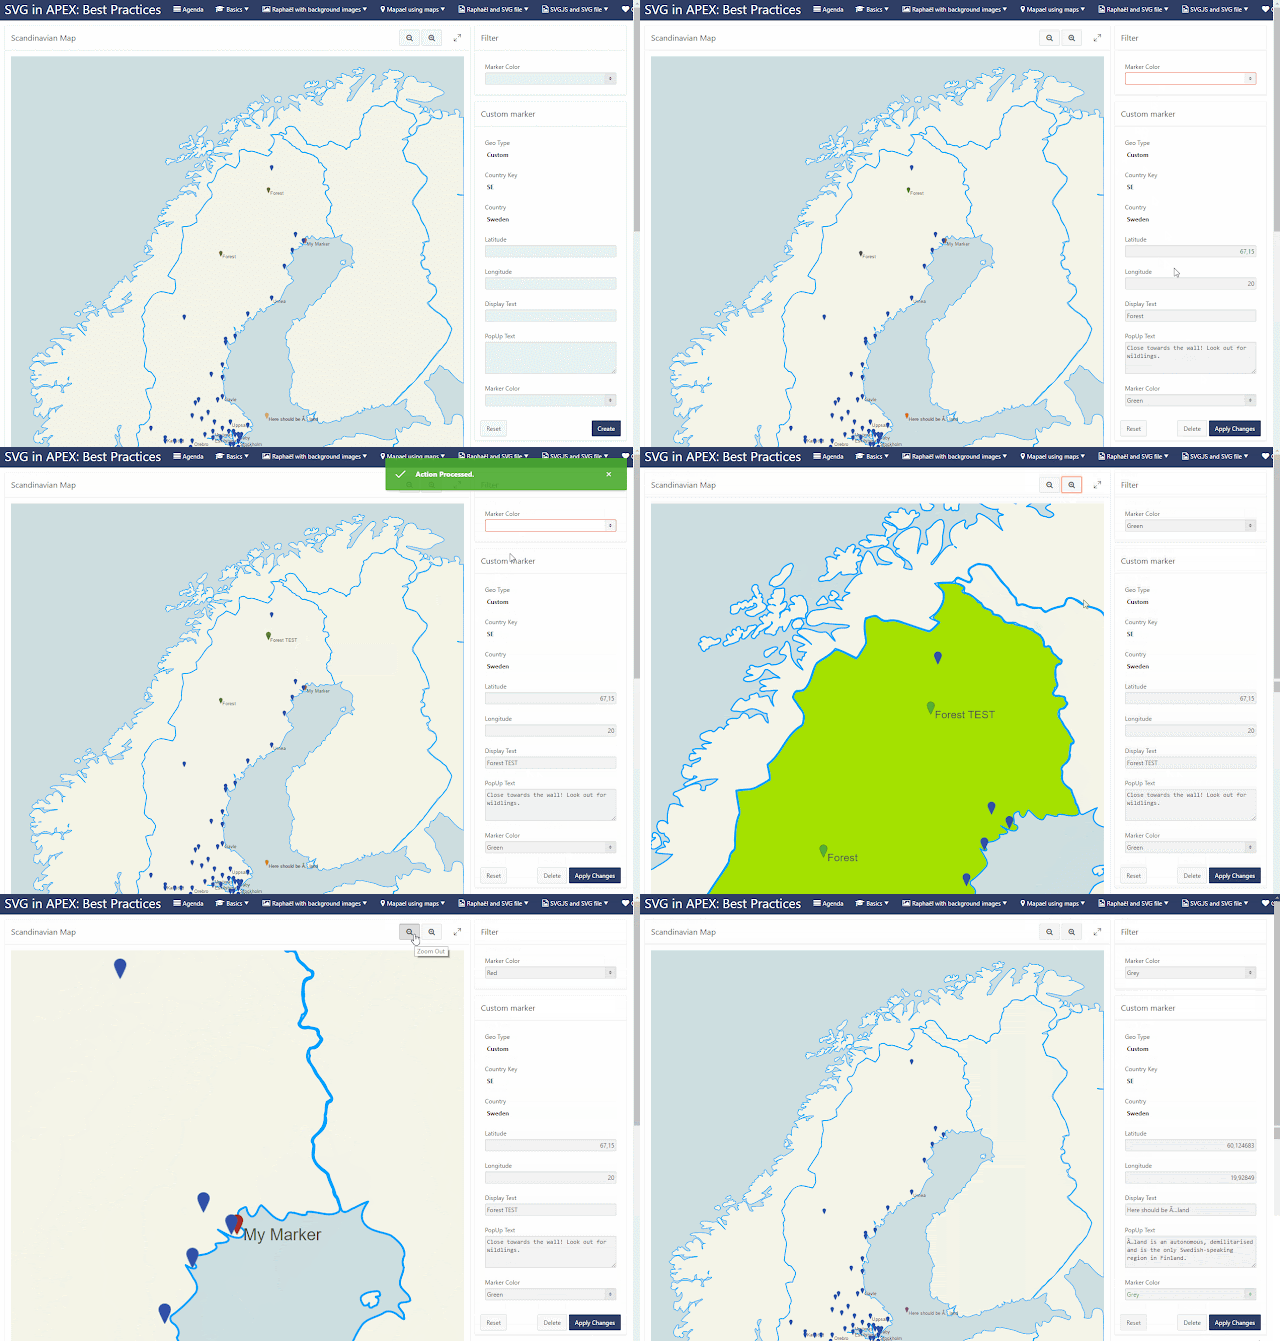
5. Mapael - Country visualization with edit mask


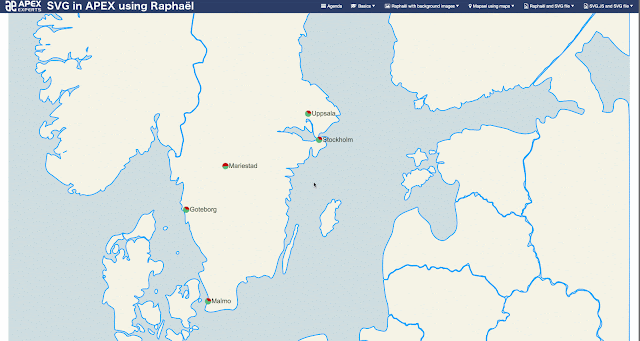
6. Mapael - Country visualization with canvas spark-line charts


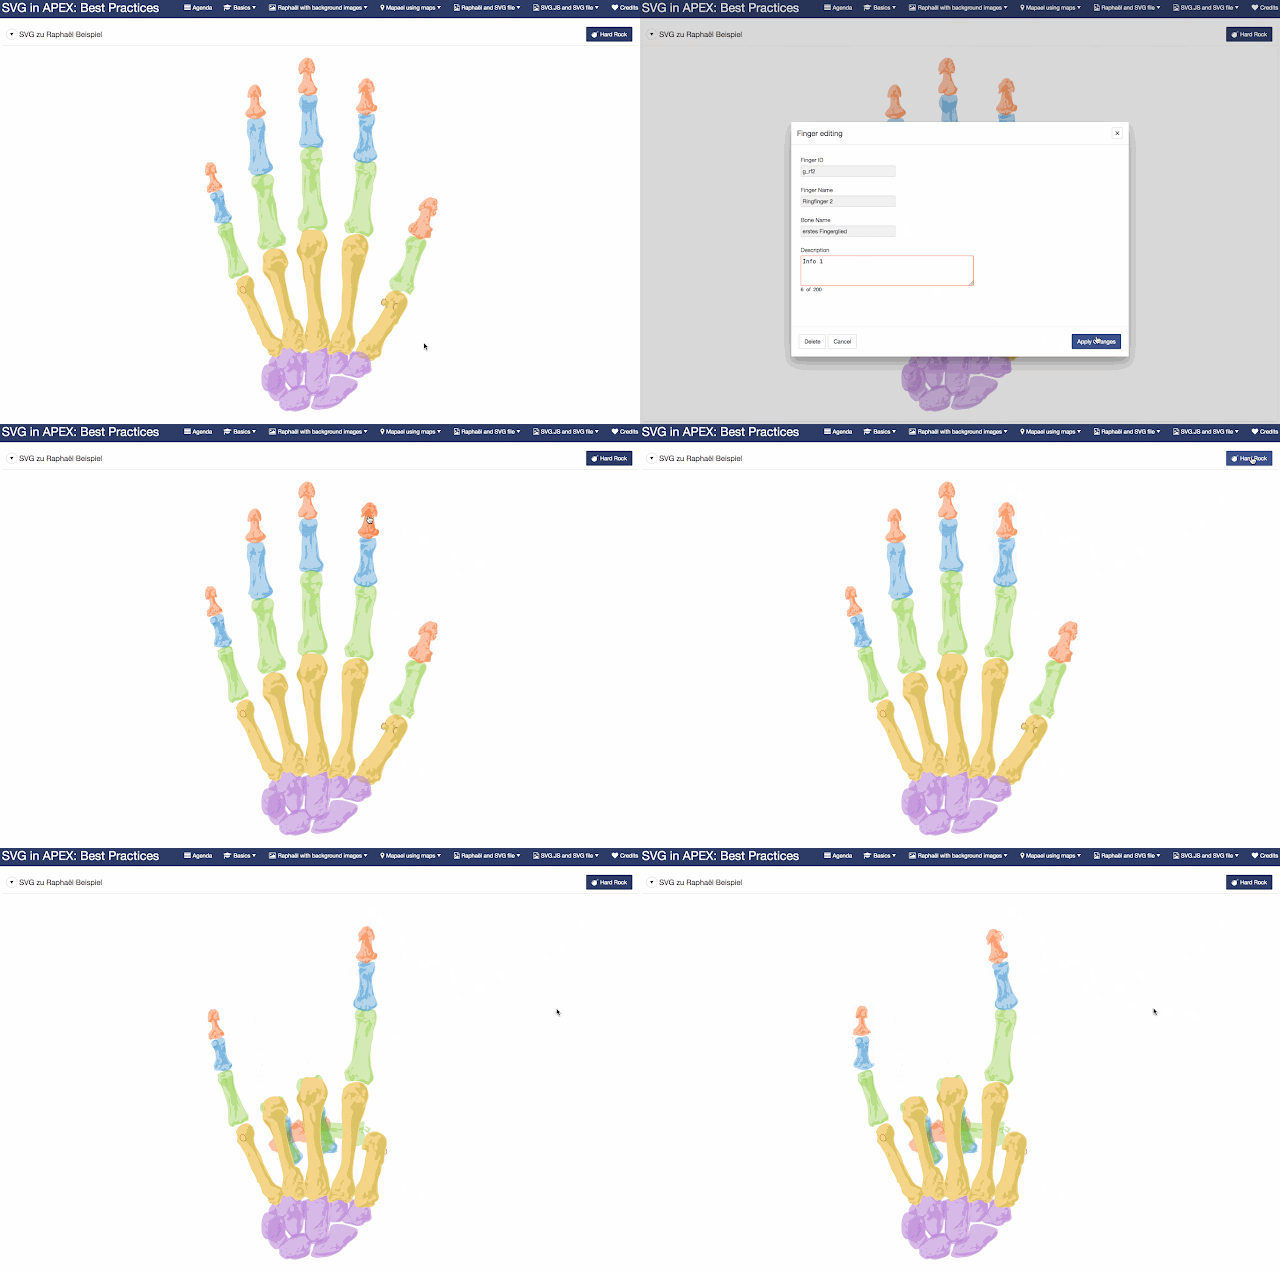
7. Raphaël - Transform, integrate and interact with external SVG file
The application includes several slides describing the way how to transform an SVG file towards Raphaël.


8. SVG.js - Integrate and interact with external SVG files

Synchron oder Asynchron? Dynamic Actions in Application Express 5.1

$
0
0
Logo Dynamic ActionsSeit dem 16. Dezember 2016 ist APEX 5.1 auf dem öffentlichen Demoserver apex.oracle.com verfügbar. Damit steht dem Testen der neuen Funktionen nichts mehr im Wege - und natürlich werden sich die Community-Tipps im Jahr 2017 intensiv mit diesen neuen Funktionen beschäftigen.
  • Oft wurde nach dem "editierbaren interactive Report" gefagt - mit dem neuen Interactive Grid ist dies nun Realität.
  • Die Integration von Oracle JET bringt viele neue Diagrammtypen - out of the box.
  • Das Universal Theme wurde erweitert und nochmals verbessert. Vor allem die neue Icon Bibliothek Font APEX ist erwähnenswert.
  • Darüber hinaus bringt das neue Release, wie immer, zahlreiche neue Funktionen im Detail.
In diesem Community Tipp geht es jedoch nicht um die neuen Features, sondern um etwas, was sich mit Application Express 5.1 auch für bestehende Anwendungen ändert: asynchrone Dynamic Actions. Dieser Tipp erläutert den Unterschied zwischen synchronen und asynchronen Dynamic Actions, was ich in 5.1 ändert und was für den Entwickler zu tun ist. Wer also schon bislang viel mit Dynamic Actions gearbeitet hat, schaut am besten gleich einmal hinein.

Phased APEX migrations

$
0
0
While looking through the comments regarding 5.1 features it occured to me how many different ways the Oracle APEX team enable us to phase our applications into any new APEX version, thereby minimising risk and introducing new IDE features to developers earlier.

I've always thought APEX does a really good job of leaving our applications alone during upgrades. It normally depends on how much the boundaries have been pushed, and how much the theme has been modified, or templates added. In fact, most of the work is in upgrading the theme, which is why the Universal Theme came about.

So that that masterpiece may start the list:

  1. Universal Theme
    Designed to remove need to migrate themes in future. Instead, theme templates re-subscribed on demand as long as you kept your theme locked to the repository.
  2. Compatibility mode
    A relict from Oracle Forms, this feature allows you to prepare your app for behavioural changes between APEX versions. This great write up from Carsten describes how asynchronous developments in 5.1 may apply to your applications.
    Check this setting on any applications borne out of earlier APEX versions.
  3. jQuery MigrateTo keep libraries lean, older functions are removed over time. Older references can sustained until they're refactored, as described by Marko.
  4. Utilities -> Upgrade Application
    APEX will leave deprecated features alone, until you're ready to upgrade each instance. The classic example is the old datepicker from 3.1. All your items called the horrible window until you replaced them all. This feature makes this process quicker and this older reference from Dimitri still applies. I may translate my mentioned of it in this presentation (as it applies to charts) to a blog post.
  5. Multiple concurrent versionsIt's not here year, but 5.2 may see the introduction of the ability to run two different APEX versions on the same database instance.
  6. apex.oracle.com
    This will always be a sandbox for the latest version or patch, so why not try your applications out in there? You can script up your tables, generate some data and import your app. Start preparing now and see how much your application won't break.
    Let's not forget apexea.oracle.com, when the latest major release is in early adopter mode.
If you can think of any others, let me know and I'll add them to the list.

Or do you have any stories of nasty surprises? I haven't heard of too many serious issues with APEX upgrades.

#letswreckthistogether

Declarative Favicon in 5.1

Oracle Announces Oracle Application Express 5.1

$
0
0

Oracle Application Express 5.1 Release Announcement!

Oracle Application Express 5.1 is now generally available! This release is a great leap forward in end-user productivity and introduces powerful new declarative features, enabling you to develop, design and deploy beautiful, responsive, database-driven desktop and mobile applications using only a browser. 

"At Insum, we are very excited with the upcoming APEX 5.1 release. The new declarative Master-Detail-Detail capabilities, possible using the new Interactive Grid, will greatly assist many of our clients convert legacy applications to Oracle Application Express. I am not even mentioning the hundreds of new improvements that the APEX team delivers with each new release" said Francis Mignault, co-founder, CTO, Insum Solutions.   

The marquee features of Oracle Application Express 5.1 include:

Interactive Grids

Interactive Grid is a new fully featured grid component that provides powerful reporting and editing capabilities.  It includes all of the features you would expect for displaying data, including frozen columns, scroll pagination, filtering, sorting, aggregations, charting, and more.  With an editable Interactive Grid, users can add, modify, and delete data directly within the component. Additionally, Interactive Grid is designed to support all item types and item type plug-ins, enabling easy editing of columns with a variety of input controls. Finally, with Interactive Grids, developers can now easily render master-detail-detail relationships that can be n-levels deep or across.

Oracle JET Charts

The data visualization engine of Oracle Application Express 5.1 is now powered by Oracle JET (JavaScript Extension Toolkit), a modular open source toolkit based on modern JavaScript, CSS3 and HTML5 design and development principles.  The charts in Oracle Application Express 5.1 are fully HTML5 capable and work on any modern browser, regardless of platform, or screen size.  These charts provide numerous ways to visualize a data set, including bar, line, area, range, combination, scatter, bubble, polar, radar, pie, funnel, and stock charts.

Universal Theme 

Oracle Application Express 5.1 builds on the success of the Universal Theme and introduces new templates, theme styles and Live Template Options. Just like Theme Roller, Live Template Options enables you to customize your application in real time, allowing you to try out various template options to get the perfect UI for your application. This release includes Font APEX, a new icon library with over 1,100 icons, which has been specifically designed to complement the development of business applications with Oracle Application Express and Universal Theme.  Universal Theme now provides declarative support for right-to-left languages, modal dialogs that will automatically grow or shrink in height to fit their contents, and over 100 other enhancements. You can learn more in the Universal Theme Sample Application which has been updated to provide better examples, more documentation, an icon and button builder, and a whole lot more!

Application Builder Improvements

In Oracle Application Express 5.1, wizards have been streamlined with smarter defaults and fewer steps, enabling developers to create components quicker than ever before. 

There have also been a number of enhancements to Page Designer, including the integration of Component View, layout customizations, property filtering, and more. Page Designer can now be customized to be displayed in two or three columns, and individual tabs can be reordered using drag and drop. Property Editor now features a live search filter enabling developers to quickly find properties. These features, along with improved page navigation and refined user interface, are designed to enhance the overall developer experience.

Productivity Apps

Oracle Application Express 5.1 includes enhancements to all existing productivity and sample apps, and also introduces three new productivity apps - Competitive Analysis, Quick SQL and REST Client Assistant:

  • Quick SQL provides a quick and intuitive way to generate a relational SQL data model based on text in a markdown-like format. Additionally, the app provides many options to generate SQL including generating triggers, APIs and history tables.  
  • REST Client Assistant enables developers to access RESTful services defined in both Application Express workspaces and public services. The app provides metadata-driven mapping from service response data to SQL result set columns. The generated SQL and PL/SQL code can then be used directly in Oracle Application Express applications.
  • Competitive Analysis can be used to create side-by-side comparisons which can be edited by many users simultaneously. These comparisons can be scored and displayed in aggregated chart form, or in a more detailed text form.

Improvements have been made to all of the Sample and Productivity apps, capitalizing on the new functionality of Oracle Application Express 5.1. The Sample Charts app has been completely revamped to showcase the all new Oracle JET Charts and is an outstanding demonstration of the data visualization capabilities in Oracle Application Express 5.1. The Sample Master-Detail app now highlights the different ways related tables can be displayed using a marquee page or different combinations of Interactive Grids. This release also includes three new Sample apps: Sample Interactive Grids, Sample Projects, and Sample REST Services. The Sample Interactive Grids app demonstrates the rich functionality of Interactive Grids including read-only, editable, and advanced capabilities. 

"Oracle Application Express will allow you to build any data-driven web application with less effort as compared to traditional programming languages. The added Interactive Grid component in APEX 5.1 will extend the capabilities of Application Express, thereby covering even the most complex requirements for dialogs out-of-the-box. I therefore foresee a great uptake of customers that will migrate their legacy apps to Application Express" said Niels de Bruijn, Business Unit Manager and Oracle Ace Director, MT AG, Germany.  

Additional Information

Oracle Application Express is a high productivity platform for creating declarative, low code Web applications on the Oracle Database and in the Oracle Cloud.  To learn more about Oracle Application Express, visit apex.oracle.com.  To learn more about Oracle Database Cloud, visit cloud.oracle.com/database

Oracle Apex 5.1 is here

Viewing all 2258 articles
Browse latest View live